Can I Install Katzkin Myself? DIY Guide for Auto Enthusiasts
Yes, you can install Katzkin yourself without professional assistance. All you need is a basic understanding of car interiors and the proper tools.
With a simple step-by-step guide, you can transform your vehicle’s interior to your liking. Whether you want to upgrade your seat covers or add additional features, installing Katzkin is a DIY-friendly process. By following the instructions carefully, you can achieve a professional-looking result at a fraction of the cost that you would incur by hiring a professional installer.
So, if you’re ready to tackle a fun and rewarding project, installing Katzkin yourself is definitely a feasible option. Experience the satisfaction of customizing your car interior to your exact preferences without breaking the bank.
Assessing Your Diy Skills
Understanding your current skill level is crucial when it comes to Katzkin installation. If you’re considering installing Katzkin yourself, there are a few abilities you should possess. Attention to detail is essential, as you’ll be working with intricate components and materials. Patience is also key, as this task may take some time to complete.
Moreover, having basic upholstery knowledge will be beneficial. This includes understanding how to remove and install trim pieces, as well as working with patterns and templates. Additionally, hand-eye coordination is important to ensure accurate measurements and precise cuts.
As for tools and space, it’s crucial to have the necessary equipment for the job. This includes a sewing machine, adhesive, trim removal tools, and measuring instruments. You’ll also need a clean, well-lit workspace with enough room to maneuver around the vehicle.
Installing Katzkin yourself can be a rewarding experience, but it requires certain skills and resources. Assessing your abilities and ensuring you have the necessary tools and space will help you determine if you’re ready to take on this task.
Pre-installation Essentials
Installing Katzkin upholstery yourself can be a rewarding project that adds a personal touch to your vehicle. However, it’s important to consider a few essentials before you begin. Firstly, choosing the right Katzkin kit for your vehicle is crucial. Ensure that you select the kit that fits your make and model perfectly, as each kit is specifically designed for certain vehicles.
Next, preparing your workspace is essential for a smooth installation process. Clear a well-lit area, preferably indoors, where you can comfortably work on your vehicle. Make sure you have all the necessary tools for the job, such as socket wrenches, screwdrivers, and trim removal tools, to name a few. Having these tools readily available will save you time and frustration during the installation process.
By following these pre-installation essentials, you’ll be well-equipped to embark on your Katzkin upholstery installation journey with confidence.
Removing Your Old Upholstery
| Can I Install Katzkin Myself? | |
|---|---|
| Heading: Removing Your Old Upholstery | |
| Subheading: Tools needed for removal | |
| Removing Your Old Upholstery | |
|
When installing Katzkin yourself, the first step is to remove your old upholstery. This process may seem daunting, but with the right tools and some patience, it can be done. The tools needed for removal include a pair of pliers, a staple remover, and a flathead screwdriver. Tips for keeping track of hardware: As you remove the upholstery, it’s important to keep track of any hardware that may be attached to it. One tip is to use small plastic bags or containers to store the hardware so that nothing gets lost or misplaced. Cleaning and prepping the seats: Once the old upholstery is removed, it’s a good idea to clean and prep the seats before installing the new Katzkin upholstery. This can be done by vacuuming any debris and using an upholstery cleaner to remove stains or dirt. Make sure the seats are completely dry before moving on to the installation process. |
|
Installing Katzkin On The Front Seats
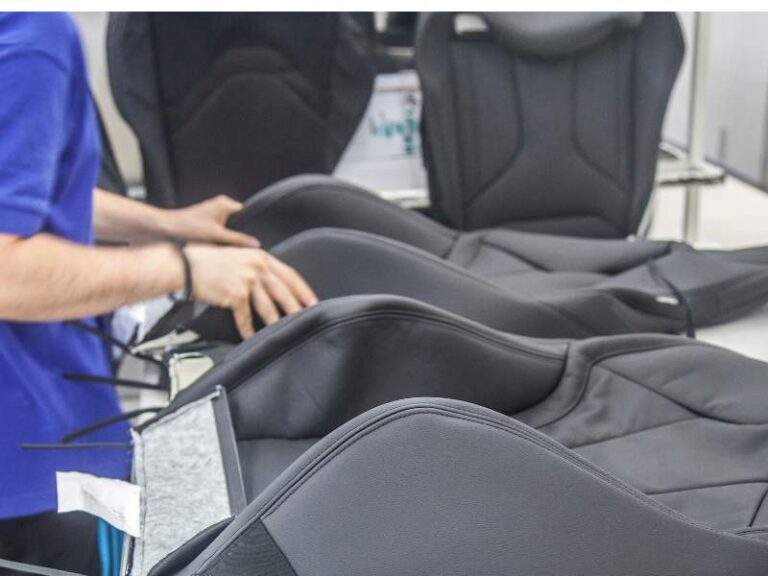
When installing Katzkin covers on your front seats, it is important to properly position and align them to achieve a professional look. Start by removing the existing seat covers and thoroughly clean the seats to ensure a smooth and clean surface. Secure the covers using the recommended techniques and tools, such as hog rings or clips, to ensure a tight fit.
Positioning and aligning the Katzkin covers is crucial for a flawless installation. Carefully follow the manufacturer’s instructions, ensuring that the covers are centered and aligned with the seat contours.
To secure the covers, utilize the appropriate techniques and tools. Hog rings or clips are commonly used to fasten the covers to the seat frame, providing a secure fit that will prevent shifting over time. Make sure to pull the covers tightly to eliminate any creases or wrinkles.
Complete the installation with finishing touches for a professional look. Smooth out any remaining wrinkles or imperfections, paying attention to corners and edges. Trim any excess material carefully for a neat and seamless appearance.
When installing Katzkin covers on your front seats, proper positioning, aligning, and securing techniques are essential for a successful and visually appealing outcome. Follow these steps diligently to achieve the desired results.
Installing Katzkin On The Rear Seats
Installing Katzkin on the rear seats of your vehicle is a task that can be done DIY style, provided you have the right tools and follow the proper steps. Special considerations need to be taken into account when it comes to rear seat installation, as they differ from the front seats.
For bench seats, start by removing the rear seat cushion and backrest from your vehicle. Ensure that you clean and prepare the seats before installing the Katzkin leather upholstery. Next, carefully fit the Katzkin seat covers onto the rear bench, following the specific instructions provided with your kit. Take your time to align the covers properly and make any necessary adjustments to achieve a snug and safe fit.
For split seats, the process is slightly different. Begin by removing the headrests and folding down the seat backs. Clean and prepare the seats, then proceed to install the Katzkin covers on each section separately, following the step-by-step instructions provided.
Remember to take your time and refer to the installation guide for specific details related to your vehicle model. With patience and attention to detail, you can successfully install Katzkin on your rear seats, transforming the look and feel of your vehicle’s interior.
Common Installation Challenges And Solutions
Installing Katzkin yourself can be a rewarding endeavor, but it does come with its fair share of challenges. One common challenge is dealing with stubborn fittings and clips, which may require some extra effort and creativity to remove or adjust. Another challenge to watch out for is smoothing out wrinkles and folds in the leather, as these can affect the overall appearance and comfort of the finished installation.
It is important to carefully work out any wrinkles and folds to ensure a tight and smooth fit. Lastly, seat feature complexities, such as airbags and seatbelts, pose additional challenges during the installation process. It is crucial to take into account these features and tailor the installation accordingly to maintain safety and functionality.
With proper attention to detail and a willingness to tackle these challenges head-on, you can successfully install Katzkin yourself and enjoy the transformed look and feel of your vehicle’s interior.
Post-installation Tips
After successfully installing your Katzkin seat covers, it’s important to follow some post-installation tips to ensure their longevity and maintain their appearance. Maintenance and care are essential for preserving the quality of your new seat covers. Regularly vacuuming and wiping down with a damp cloth will help remove any accumulated dirt or debris. For tougher stains, use a mild soap and water mixture, and avoid harsh chemicals or solvents.
In case you encounter any post-installation issues, such as loose stitching or fitting problems, refer to the troubleshooting guide provided by Katzkin. It’s crucial to address these issues promptly to prevent any further damage. Lastly, protecting your Katzkin investment is equally important.
Avoid exposing the seats to direct sunlight or extreme temperatures and consider using seat covers or upholstery protectors when necessary. By following these simple maintenance and care steps, you can enjoy long-lasting and pristine Katzkin seat covers for years to come.
Frequently Asked Questions Of Can I Install Katzkin Myself?
Can I Install Katzkin On My Own?
Yes, you can install Katzkin yourself if you have intermediate to advanced DIY skills. The process involves removing your vehicle’s seats, fitting the new Katzkin upholstery onto them, and reinstalling the seats. It’s important to read the installation instructions carefully and follow them step by step to ensure a proper installation.
However, if you’re not confident in your DIY abilities, it’s recommended to have a professional install it for you to avoid any potential issues.
How Long Does It Take To Install Katzkin?
The installation time for Katzkin can vary depending on your skill level and experience. On average, it takes about 4-6 hours to install Katzkin upholstery for a complete set of seats. Keep in mind that this estimate is for someone with moderate DIY skills.
If you’re not familiar with automotive upholstery or have never done a similar project before, it may take longer. It’s important to set aside enough time and be patient during the installation process to ensure a high-quality result.
Do I Need Any Special Tools To Install Katzkin?
While you don’t need any specialized or unique tools, there are a few basic tools that you’ll need to install Katzkin upholstery. These include a set of wrenches or sockets, screwdrivers, hog ring pliers, and a staple gun. Additionally, it’s recommended to have a heat gun or hairdryer handy to help shape the upholstery around corners and contours.
Make sure to gather all the necessary tools before starting the installation process to avoid any delays or frustrations.
Can I Reuse My Current Seat Covers When Installing Katzkin?
No, Katzkin upholstery installation requires the removal of your vehicle’s current seat covers. The new Katzkin upholstery is designed to replace and cover your existing seat covers completely. It’s important to remove any old seat covers before installing Katzkin to ensure a proper fit and finish.
Removing the old seat covers also allows the Katzkin upholstery to be properly secured and stretched over the seats during installation.
Conclusion
Installing Katzkin yourself can be a feasible option if you have the necessary skills and tools. It allows you to save money and customize your car’s interior according to your preferences. However, it requires careful planning, patience, and attention to detail to ensure a successful installation.
Before embarking on this task, make sure to thoroughly research and understand the process to achieve the desired results. Remember, seeking professional help may be a better choice if you are uncertain about your abilities.

- Can I Get in a Taxi Without a Car Seat? - January 26, 2025
- Can I Get Chlamydia From a Toilet Seat? - January 26, 2025
- Can I Get an Uber With a Car Seat? - January 26, 2025