How to Remove a Car Seat Cover Perfectly | Step by Step Guidelines
To remove a car seat cover, press buttons at both sides and detach snaps near the handle. Pull the canopy out of the shell canal and detach the three canopy snaps from the back shell.
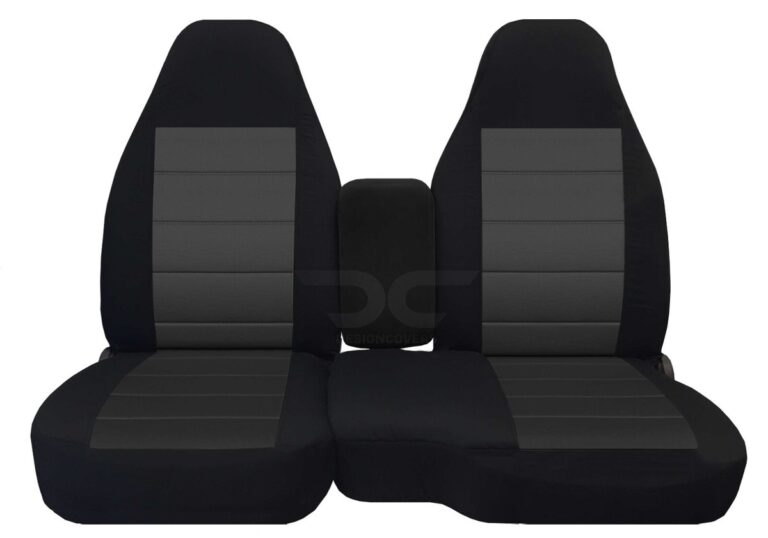
Car seat covers are a great way to protect your vehicle’s seats from dirt, spills, and wear over time. However, whether you need to clean them, replace them, or simply install new ones, knowing how to remove them perfectly is essential to avoid damage to the seats or covers. This detailed guide provides a step-by-step process for removing car seat covers with precision, ensuring that both your car and the covers stay in top condition.
Introduction
Car seat covers are crucial for keeping your car’s interior clean and well-preserved. Over time, however, they collect dirt, food crumbs, pet hair, and more. Removing your car seat covers is the first step in cleaning them thoroughly or replacing them with fresh ones. In this extended guide, we’ll walk you through every aspect of seat cover removal, from preparing your tools to tackling tricky areas like clips, fasteners, and covers fitted over airbags.
Tools You Will Need
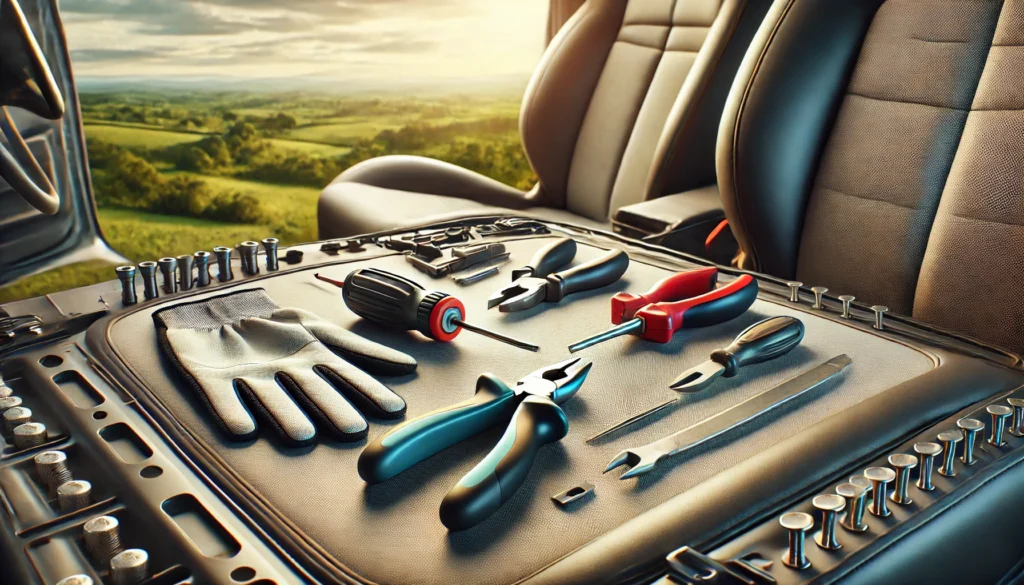
To ensure a smooth and damage-free removal of your seat covers, having the right tools is critical. Here’s a list of essential and optional tools that can make the process easier:
| Tool Type | Purpose | Where It Helps |
|---|---|---|
| Flathead screwdriver | For prying loose any clips or hooks holding the covers | Useful for removing tight clips |
| Pliers | To unhook stubborn straps or tight clips | For tricky areas under the seat |
| Scissors | Cutting through zip ties or tightly knotted strings | Useful for removing tough fasteners |
| Trim removal tool | Avoids scratching or damaging seat plastic trims | Necessary for seats with plastic covers |
| Needle-nose pliers | For reaching tight or awkward spaces | Reaching deep into seat crevices |
| Hex or Torx wrench | For seats with removable attachments | Helps remove headrests or fixed trims |
Preparing for Seat Cover Removal
Before starting the process of removing your seat covers, there are a few preparatory steps you should take. These will make the removal process more efficient and protect your vehicle’s interior.
Check Your Car’s Manual
Every vehicle is different, and some cars have unique mechanisms for attaching seat covers. Your manual might indicate whether there are special precautions to take or if there are any safety systems, such as airbags, integrated into the seat. Be sure to check if your seats include built-in airbag systems, as you’ll need to be extra careful when handling covers in these areas.
Lay Down Protection for the Interior
Removing seat covers can release dust, dirt, and debris into the vehicle. To protect your car’s flooring, spread a blanket, sheet, or tarp over the area. This will also help you avoid scratching any interior surfaces with tool
Work in a Clean, Spacious Area
Since you’ll likely need to maneuver around the car’s interior, make sure you’re working in a space with ample room to move, and keep all necessary tools nearby.
Understanding the Types of Car Seat Covers
Before jumping into removal, it’s important to understand which type of seat cover you’re dealing with, as this will affect the removal process. Different types of seat covers vary in how they are secured to the seat.
| Type of Seat Cover | Description | Ease of Removal |
|---|---|---|
| Custom-Fit Seat Covers | Tailored specifically for your car model, offering a snug, accurate fit | Relatively easy, well-placed fasteners |
| Universal Seat Covers | Designed to fit multiple car models, often secured with elastic straps, clips, or hooks | Can be more challenging, as fit is less precise |
| Leather/High-End Covers | Often have more complex fasteners, designed to blend into the seat’s original appearance | May require extra care and time |
| Airbag-Compatible Covers | Have special seams to allow airbags to deploy, requiring careful handling | Need careful removal to avoid damaging airbag systems |
Identifying the Attachment Points
Car seat covers are typically attached in several different ways. Familiarizing yourself with these attachment points beforehand will make the removal process smoother.
Common Types of Attachments:
- Straps and Hooks: Usually found under the seat, they are threaded through loops or hooked onto the frame.
- Clips: Plastic clips that attach to the seat frame or anchor points to hold the cover in place.
- Zippers: Some seat covers use zippers for a snug fit, often on the side or back of the seat.
- Velcro: A common feature on the sides or back of universal seat covers, allowing easy attachment and removal.
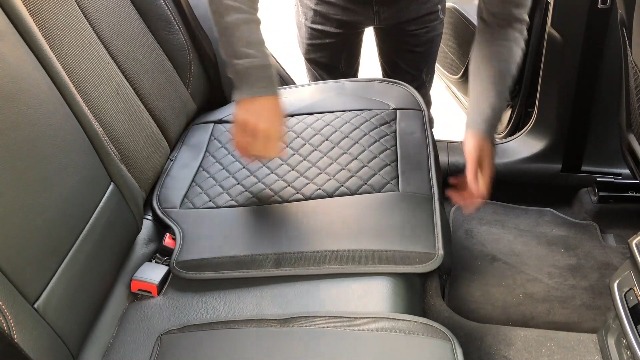
Step 1: Detaching the Bottom Seat Section
Start with the bottom section of the seat, as it’s typically secured the tightest. Here’s a step-by-step process for removing it properly.
- Locate the Straps or Clips: Feel around the edges and underside of the seat to find the straps or clips securing the cover. They may be tucked deep under the seat.
- Release the Fasteners: Use a flathead screwdriver or pliers to carefully unhook or release the straps or clips.
- Slide the Cover Off: Once the straps are released, you can begin pulling the cover upwards from the seat base. If it’s tight, pull gently to avoid tearing.
Step 2: Removing the Backrest Cover
After freeing the seat bottom, move on to the backrest. This can sometimes be more complicated due to the seat’s design or attached headrest.
- Remove the Headrest: If your seat cover is attached around the headrest, remove the headrest first by pressing the release button or pulling it free if your model allows it.
- Loosen the Backrest Cover: Gently pull the cover upwards from the bottom of the backrest. Be cautious around areas where seatbelts or armrests intersect with the cover.
- Free the Seatbelt Slots: If your cover has openings for the seatbelt, carefully work the belt through these slots without stretching or tearing the fabric.
Step 3: Handling Seat Cover Clips and Fasteners
Many seat covers are secured with hidden clips or fasteners that can be tricky to release. Here’s how to handle them:
- Locate Hidden Clips: Use a trim removal tool to carefully lift up any plastic trim panels to locate the hidden clips.
- Pry the Clips Gently: Insert the flathead screwdriver under the clip and slowly pry it upward to release the fastener. Take your time to avoid breaking any parts.
- Undo Fasteners: If your seat cover has fasteners such as snap buttons or zippers, undo these carefully, ensuring not to damage the cover or seat.
Step 4: Removing the Headrest Covers
Headrest covers are usually the easiest part to remove, but they still require care to avoid stretching or damaging the fabric.
- Pull Out the Headrest: Most headrests are removable by pressing a small button located near the base. Once released, pull it upward and out of the seat.
- Slide the Cover Off: Once the headrest is removed, pull the cover off evenly from both sides to prevent the fabric from stretching or tearing.
- Check for Clips or Fasteners: In some cases, the headrest cover may have clips or Velcro fastenings underneath. Be sure to undo these gently.
Step 5: Removing Seat Covers with Built-in Airbags
If your vehicle has airbags built into the seats, you’ll need to be extra cautious when removing the covers. Follow these steps to ensure you don’t interfere with any safety features.
- Airbag Compatibility Labels: Check for any labels or markings on the seat covers that indicate airbag compatibility. These labels often show where the airbags are located.
- Work Slowly Around Airbags: Avoid tugging or pulling too hard in areas where the airbags are located. If you’re unsure, consult your vehicle’s manual or a professional.
- Don’t Interfere with Wiring: Airbags are often connected to wiring harnesses. Be careful not to disturb any visible wiring when removing the cover.
Dealing with Stubborn Seat Covers
Sometimes, seat covers can be difficult to remove due to their tight fit or because they are caught under plastic trims. Here’s how to deal with these situations:
- Stretchy Covers: Gently pull and stretch the material, working in small sections. If you encounter resistance, try adjusting the angle of your pull.
- Covers Stuck Under Trims: Use a trim removal tool or flathead screwdriver to carefully pry up the trim enough to release the cover. Avoid using too much force to prevent damaging the plastic.
Cleaning and Storing Removed Seat Covers
Once your seat covers are removed, it’s important to clean and store them properly to maintain their condition.
| Cleaning Method | Best For | Care Instructions |
|---|---|---|
| Machine Wash | Most fabric or cloth seat covers | Wash on a gentle cycle in cold water. Use mild detergent and avoid bleach. Air dry or tumble dry on low. |
| Hand Wash | Delicate fabrics or leather covers | Use mild soap and water. Gently scrub with a soft brush, then rinse. Allow to air dry. |
| Professional Cleaning | Leather or high-end materials | For leather or custom seat covers, it’s best to take them to a professional cleaner to avoid any damage. |
Storage Tips:
When storing your seat covers, lay them flat to prevent wrinkles. Avoid folding tightly, as this can cause permanent creases. Keep them in a dry, cool space, away from direct sunlight.
Reinstalling the Seat Covers After Cleaning
After your covers are cleaned and dried, reinstalling them properly ensures a snug fit and long-lasting protection.
- Align the Cover Correctly: Start by placing the cover on the headrest or backrest. Ensure that all openings (such as for seatbelts and armrests) are properly aligned.
- Secure All Straps and Fasteners: Reattach all clips, zippers, and straps tightly, ensuring the cover fits snugly without wrinkles or loose sections.
- Check for a Smooth Finish: Once reinstalled, smooth out the fabric, and ensure it fits properly over the seat’s contours without any loose or uneven areas.
Safety Checks After Reinstallation
After reinstalling the seat covers, it’s important to conduct a thorough safety check:
- Check for Loose Straps: Make sure no straps or hooks are left unsecured, as this can cause the seat cover to slip or come loose.
- Ensure Airbags Aren’t Obstructed: Verify that any seat airbags remain unobstructed and that the cover has not blocked the airbag deployment zones.
Common Mistakes to Avoid
To ensure the removal and reinstallation process goes smoothly, avoid these common mistakes:
- Rushing the Process: Patience is key. Taking your time ensures you don’t tear the cover or damage the seat during removal.
- Not Checking the Vehicle’s Manual: Each car may have specific instructions for seat cover removal, particularly if airbags are involved.
- Forgetting to Clean Fasteners: If you plan on reinstalling the same covers, clean the fasteners, zippers, and Velcro before putting them back on the seats.
When to Replace Seat Covers Instead of Reinstalling
If your seat covers show signs of significant wear, such as fraying edges, holes, or irreparable stains, it may be time to replace them. When selecting new covers, look for high-quality, durable fabrics that offer easy cleaning and a secure fit. Additionally, make sure to choose airbag-compatible covers if your vehicle requires them.
Frequently Asked Questions
How often should I remove my car seat covers for cleaning?
Regular use, especially with pets or children, calls for cleaning every 3-6 months. However, if your car sees minimal use, an annual cleaning may suffice.
Can I remove seat covers if my car has built-in airbags?
Yes, but proceed with caution. Always ensure that the covers are airbag-compatible, and take extra care around airbag deployment zones.
What should I do if the clips are too tight to release?
Using a flathead screwdriver or needle-nose pliers can help you carefully pry the clips without damaging them or the seat.
Are universal seat covers harder to remove than custom-fit covers?
Universal covers can be more challenging, as they often require adjustments for different seat shapes. Custom-fit covers are typically easier to remove due to their precise design.
Can I machine wash all seat covers?
Most fabric seat covers can be machine washed, but it’s important to check the care label for specific instructions.
Is it safe to remove seat covers if my car has electric seat features?
Yes, but be sure not to disturb any electrical components. Always consult your vehicle’s manual if you’re unsure about any wiring or connections.
Conclusion
Removing car seat covers doesn’t have to be a daunting task. By following this extended step-by-step guide and using the right tools, you can remove and reinstall your covers with ease. Properly maintaining your seat covers through regular cleaning and careful handling will keep your car’s interior looking great for years to come.

- Can I Get in a Taxi Without a Car Seat? - January 26, 2025
- Can I Get Chlamydia From a Toilet Seat? - January 26, 2025
- Can I Get an Uber With a Car Seat? - January 26, 2025